 Pin It
 Last Tuesday, I stood in my kitchen at 7 PM, starving and staring at a bag of pitas and some chicken that needed to become dinner fast. My college roommate used to make these incredible chicken caesar wraps, and I suddenly remembered how she'd cram everything into portable packages we could eat while studying. I decided to pitafy the concept, and honestly, it is now a weeknight staple I cannot believe I lived without.
My brother came over last month when I was testing this recipe, and he literally ate three pitas while leaning against my refrigerator. That is when I knew this was not just a recipe but a legitimate life strategy for feeding hungry people efficiently.
Ingredients
- 2 large chicken breasts, cut into strips: Cutting against the grain makes these tender and easy to stuff into pitas
- 1 cup buttermilk: This is the secret to restaurant-style tenderness, and I have tried skipping it, do not skip it
- 1 cup panko breadcrumbs: Panko creates that ultra-crispy exterior that stays crunchy even inside the pita
- ½ cup grated Parmesan cheese: Mixed into the coating, this adds savory depth and helps the breadcrumbs cling
- ½ tsp garlic powder: Essential for that classic Caesar flavor profile without fresh garlic burning in the air fryer
- ½ tsp paprika: Adds beautiful color and a subtle warmth that complements the creamy dressing
- ½ tsp salt: Just enough to enhance all the flavors without making it salty
- ¼ tsp black pepper: Freshly ground makes a noticeable difference here
- Cooking spray: Light spraying helps achieve that gorgeous golden crunch without excess oil
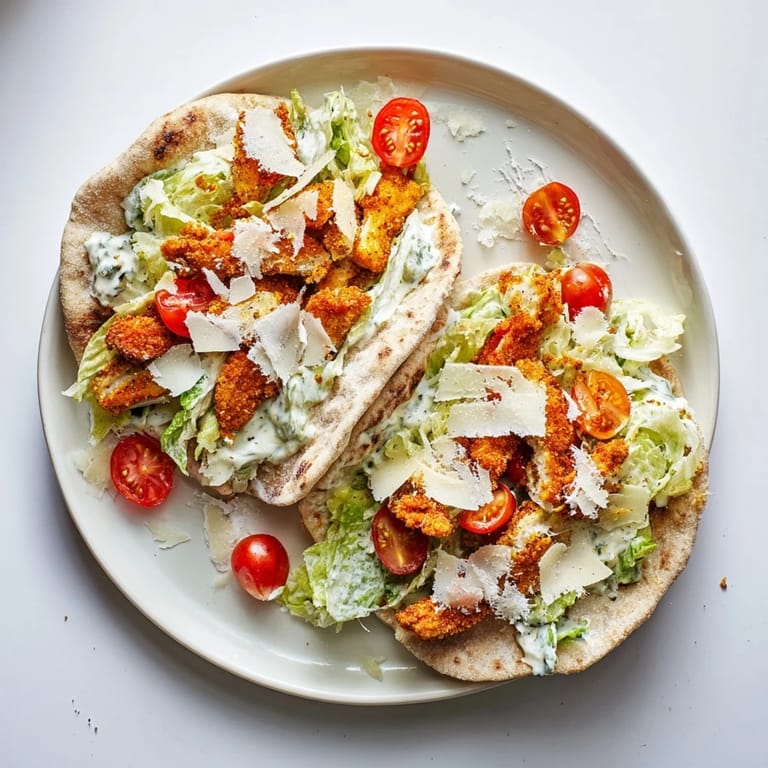
- 1 large head romaine lettuce, chopped: Ice-cold, crisp romaine creates the perfect temperature contrast with hot chicken
- ½ cup Caesar dressing: Use your favorite, whether homemade or store-bought, just make it good
- ¼ cup shaved Parmesan cheese: Shaved rather than grated gives you those lovely salty pockets throughout
- ½ cup cherry tomatoes, halved (optional): I add these when I remember, and they bring bright acidity and color
- Freshly ground black pepper, to taste: A generous grind on top pulls everything together
- 4 pita breads, warmed: Warm pitas are more pliable and less likely to tear when you stuff them
- Extra Caesar dressing, for drizzling: Because there is no such thing as too much Caesar
- Lemon wedges (optional): A quick squeeze right before eating brightens all the rich flavors
Tired of Takeout? 🥡
Get 10 meals you can make faster than delivery arrives. Seriously.
One email. No spam. Unsubscribe anytime.
Instructions
- Marinate the chicken:
- Submerge chicken strips in buttermilk for at least 15 minutes, though 2 hours in the refrigerator makes them magically tender. I have marinated them overnight in a pinch and they were still fantastic.
- Prep your coating station:
- Whisk together panko, grated Parmesan, garlic powder, paprika, salt, and pepper in a shallow bowl until well combined. This mixture keeps in an airtight container for weeks if you want to double it.
- Coat the chicken:
- Lift each strip from the buttermilk, letting excess drip off, then press firmly into the crumb mixture. The pressing is crucial, do not just gently lay it on there or you will lose all that crispy goodness.
- Arrange for air frying:
- Place coated strips in a single layer in your air fryer basket, leaving space between each piece. A quick spray with cooking spray helps them achieve that restaurant-quality golden color.
- Cook until crispy:
- Air fry at 400°F for 10 to 12 minutes, flipping halfway through, until deeply golden and cooked through. I start checking at 10 minutes because nobody likes dry chicken.
- Make the salad:
- While chicken cooks, toss romaine with Caesar dressing, shaved Parmesan, and tomatoes if using. The dressing should lightly coat everything, not drown it.
- Warm the pitas:
- Heat pitas in a dry skillet for 30 seconds per side or microwave for 15 seconds. Carefully cut each pita open to create pockets, being gentle not to tear all the way through.
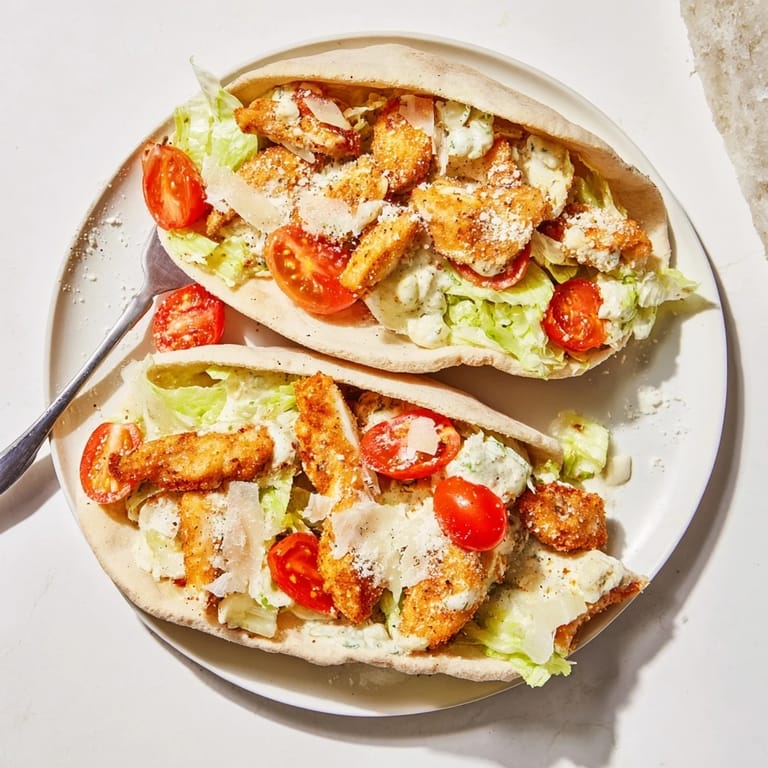
- Assemble your pitas:
- Stuff each warm pita with Caesar salad mixture and 2 to 3 chicken strips. Add extra dressing and a squeeze of lemon if you are feeling fancy.
- Serve immediately:
- These are best enjoyed right away while the chicken is still crispy and the pitas are warm. Leftover components can be stored separately, but the assembled pitas do not keep well.
 Pin It
 My husband claimed he did not want dinner until he walked through the door and smelled these. Now he requests them weekly, and I have caught him eating the leftover chicken strips plain, standing in front of the refrigerator at midnight.
Making Ahead
I have marinated and breaded the chicken up to 6 hours ahead, keeping it refrigerated on a parchment-lined baking sheet until air fry time. The dressed salad can sit for about 30 minutes before getting sad, so time your assembly carefully.
Air Fryer Tips
Every air fryer runs slightly different, so start checking your chicken at the 8-minute mark the first time you make this. I have learned that working in batches yields better results than overcrowding, even though it takes a few extra minutes.
Serving Ideas
Serve these with extra lemon wedges and perhaps some simple roasted vegetables on the side. They also pair beautifully with a crisp white wine if you are feeling fancy on a Tuesday.
- Try these for lunch the next day with the components stored separately and assembled fresh
- Add croutons inside the pita if you want maximum crunch in every bite
- These are perfect for feeding a crowd, just double or triple everything
 Pin It
 I hope these bring as much joy to your weeknight table as they have to mine. There is something deeply satisfying about turning humble ingredients into something that feels special without requiring hours of your time.
Recipe FAQs
- → Can I bake the chicken instead of using an air fryer?
Yes, bake the breaded chicken strips at 425°F for 15-18 minutes, flipping halfway through until golden brown and cooked through. The air fryer simply creates a crispier exterior with less oil.
- → How do I prevent the pita from getting soggy?
Warm the pitas just before serving and assemble right before eating. You can also toast the cut sides of the pita lightly to create a barrier against moisture. Adding a small amount of dressing inside each pita rather than soaking the lettuce helps too.
- → What can I use instead of buttermilk for marinating?
Mix regular milk with 1 tablespoon of vinegar or lemon juice, let stand for 5 minutes to thicken. Plain yogurt thinned with water works as well. The acidity helps tenderize the chicken while creating a sticky surface for breadcrumbs.
- → Can I make the chicken strips ahead of time?
Bread and cook the chicken up to 2 days ahead, then refrigerate. Reheat at 375°F for 8-10 minutes to recrisp. Assemble the pitas just before serving to maintain texture. The cooked strips also make great leftovers for salads or wraps.
- → Is there a way to make this lighter?
Use Greek yogurt-based Caesar dressing, reduce the amount of cheese, or skip the extra drizzle. Boneless skinless chicken breasts keep the protein high while keeping calories reasonable. You can also use whole wheat pitas for added fiber.
- → What vegetables work well besides romaine?
Try adding shredded carrots, thinly sliced cucumber, bell pepper strips, or red onion for extra crunch and color. Baby spinach or mixed greens can partially replace the romaine. Just keep the fillers finely chopped so they fit easily inside the pita.